
articles/Fashion/rollingwiththebigdog9-page3
Rolling with the BIG Dog Part 9 - part 3 of 1 2 3 4 5
by Damian McGillicuddy Published 01/02/2011

A custom white balance, a little akin to tungsten-balanced film, was 'dialled in' rendering the 'key' more neutral but forcing the ambient and the day-light balanced flash to render a cooler, bluer light which makes for a beautiful contrast to the orange of the latex and hair.
The third light used was the natural ambient light which, at the aperture desired, measured 1/60s on my meter. Very simply by selecting a faster shutter speed we have 'cut out' the light available to act as 'fill' thus darkening down the surroundings - finally the inclusion of the second flash-head in frame and the tilt of the camera was added to give the image a greater sense of drama and energy.
As an illustration of the technique, the second image in this short set was taken with a slower shutter speed allowing the natural ambient light to act as greater fill and reducing the degree of contrast in the image. The CTO was also removed from the 'key' and the white balance manipulated back, more towards the neutral.
Where this image differs dramatically is in post treatment. Yes - I'm known world-wide as a 'do it in camera' guy but some things you simply can't! However, please bear in mind that Photoshop, 'action' type software are IMAGE ENHANCEMENT tools and not a package put together by International Rescue to turn cr*p into gold! The more you get right in camera, the better the quality of the post.
I used a cross-process filter in onOne's amazing Photo Tools 2.6 to create this look (see review, this issue - Ed).... so still old school ;0). I'm a firm believer that you should shoot with the finished image in mind, including your intended postproduction so you can produce the most appropriate capture to make the transformation as easy as possible... stack the odds in YOUR favour all the time; it just makes your life easier and the results far better...period!
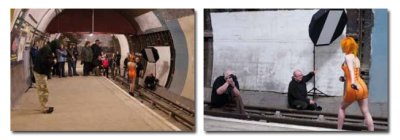
Now, eventually we got in (to the station) and started our descent, the attraction of being able to shoot in a location normally out of bounds was quite intoxicating! Our next shooting location was a partially finished tunnel.
Once more just two speedlights were pressed into action to light the image. The 'Key' once more was the 19-inch 'classic' beauty dish on a stand with its legs closed, held by Ian as a boom, to get it to the top of the tunnel and then angled down to give us the crisp and elegantly simple 'butterfly' or 'Paramount' lighting pattern. Our model, Ulorin Vex was posed almost like a sexy 'spiderwoman' to make best effect of the location and the styling. The pose is also highly important in amplifying the sexiness of her shape.
The second speedlight was placed down the tunnel just out of my line of sight. A blue gel (CTB - colour temperature blue) was very loosely placed over the flash-head. This is a trick I've used before, the loose fitting allows me to 'paint' with blue light yet have the spill of 'white' light 'clean up' other areas of the image, in this case further into the tunnel. A sort of two-effects-for-one in a way! This light also beautifully rim-lit part of Ms Vex, accentuating her figure fully. Fill was created by both a little 'wrap' from the dish and by 'dragging' the shutter to pick up what little ambient illumination there was. A very simple set-up, quick and easy to do, with major in image impact. Good does not necessarily mean complicated!
- Rolling with the BIG Dog Part 9 page 1
- Rolling with the BIG Dog Part 9 page 2
- Rolling with the BIG Dog Part 9 page 3
- Rolling with the BIG Dog Part 9 page 4
- Rolling with the BIG Dog Part 9 page 5
1st Published 01/02/2011
last update 20/07/2022 13:53:43
There are 0 days to get ready for The Society of Photographers Convention and Trade Show at The Novotel London West, Hammersmith ...
which starts on Wednesday 14th January 2026


