
articles/Glamour/creatingreflections-page3
Creating Reflections in Adobe Photoshop - part 3 of 1 2 3 4
Published 01/02/2009

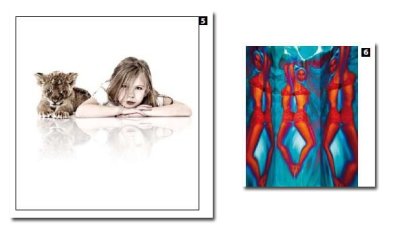
Position your Gradient tool to where you want the fade out to go to white. In this image it was around her forehead. Drag the Gradient tool upwards. You might have to play with the effect until you get the look you like. With this approach you want the reflection to start 'under' the main image. In [Fig 5] she was not quite square to the camera; by the time I had her far elbow 'under' itself, the reflection was over the top of the lion's paw and her other elbow.
Cleaning this up is easy. Once you have the right amount of reflection fade, take your brush, set to 100% with foreground colour black and just paint out the overlap on the mask. It looks a bit better if you give your reflection some white space below the fade out to complete the mirror-floor illusion. This approach works really well with jumping or airborne subjects to give a sense of height.
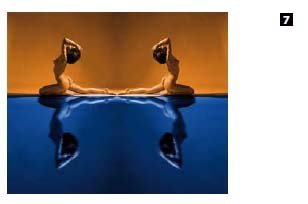
So let's look at some funky uses of this technique. In [Fig 6] I started off with Suzy actually on a mirror. Yes, that does remain a choice. This time the image has the canvas widened on both sides. The intent of this approach is to make it look like the mirrored girl is in a mirrored box. The main layer is duplicated and flipped horizontally this time, then lined up to the reflection edge. Using the Transform controls select skew. You will usually have to reduce the image view so you can see the control corners. Here I grabbed the top right corner pulling it up and out, doing the same thing the same amount.

Then there is the very arty approach. Image [Fig 8] is our starting point for this sample. I came across an action years ago called symmetry, you can find it here: https://graphicssoft. about.com/od/photoshopactions/l/blactions04.htm Essentially it enlarges your canvas, duplicates your image, flips it so you have a side-by-side mirror, then duplicates that, flipping it to the bottom so you have a mirror of the top mirror.
It winds up looking like [Fig 9]. To get the [Fig 10] effect, duplicate the background layer, use transform to shrink it down, keep it in the middle. (I placed guides to intersect in the middle for a reference.) Create a mask to remove the overlap and repeat until satisfied. You can see my final twist of having the single image in the centre.
Now this just scratches the creative surface, I am going to send you to an artist who shows you how this approach is just the base for an even more exotic but polished look.
- Creating Reflections in Adobe Photoshop page 1
- Creating Reflections in Adobe Photoshop page 2
- Creating Reflections in Adobe Photoshop page 3
- Creating Reflections in Adobe Photoshop page 4
1st Published 01/02/2009
last update 20/07/2022 13:53:41
There are 0 days to get ready for The Society of Photographers Convention and Trade Show at The Novotel London West, Hammersmith ...
which starts on Wednesday 14th January 2026


