
articles/Software/reflecmedia-page2
Reflecmedia - Chromatte Chroma Key - part 2 of 1 2 3 4 5
by Tom Lee Published 01/06/2011

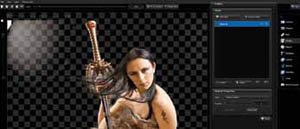
Photographing Amber was then just a matter of my imagination and creativity taking over, remembering that the images were to be placed in a composite at the end of the day. At this point the 'Chromatte' section of this test was complete, however, there are a few other precautions you should bear in mind when using this type of equipment.
Shiny objects such as the swords used in this exercise will pick up the green LED light in the reflection, so anyone with thick glasses may suffer with the same problem. This was overcome by not getting too close to the subject for the lights to take effect or by using a longer focal length lens. The transformer can also be reduced in power (minus 1) to reduce the strength of reflection. Because the green key works within a narrow light band, the software can ignore green tones outside of this bandwidth, effectively ignoring the reflections. In extreme cases, however, you may end up with some semi-transparency in your keyed image. Your subject should be placed fairly close to the fabric background (even touching it is OK!), to minimise shadows and make keying of the subject easier and more accurate. Extremes of lighting are also not recommended as large shadow areas can result from 'lopsided' lighting. A ratio of 2:1 or 3:1 is acceptable.
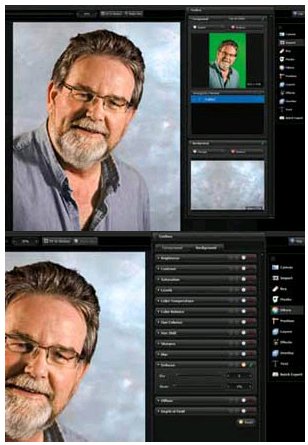
At just over £200, it's not going to break the bank and is an event photographer's dream. Imagine shooting with your 'Chromatte' system and instantly importing the images into PhotoKey 4 Pro onto any background image of your choosing and printing from the same software to your printer in seconds. There is no need to adjust your normal shooting practices and keeping it simple is what it's all about. We tried it on Podge Kelly's corporate headshot with superb results achieved by shooting only with the available studio light and using the program defaults!

There is a nifty little plug-in for users of the 32-bit version of Photoshop on their web support page that allows you to access the program directly from CS3, 4 or 5. Sadly this is not yet compatible with the 64-bit version, so we will use the software 'stand alone' as was originally intended for event photographers. Open PhotoKey 4 Pro and the project screen opens with the main work area, toolbox and tool selector on view. The pallets are customisable but the layout shown here is the default. The first thing to do is select a canvas size. One of the easiest ways to do this is to import the background or foreground in at their native size. Select 'Canvas'>Presets>As Foreground or As Background. Alternatively choose one of the other handy presets. We won't go through all the panels in this review but we'll look at the main components.
- Reflecmedia - Chromatte Chroma Key page 1
- Reflecmedia - Chromatte Chroma Key page 2
- Reflecmedia - Chromatte Chroma Key page 3
- Reflecmedia - Chromatte Chroma Key page 4
- Reflecmedia - Chromatte Chroma Key page 5
1st Published 01/06/2011
last update 20/07/2022 13:53:43
There are 0 days to get ready for The Society of Photographers Convention and Trade Show at The Novotel London West, Hammersmith ...
which starts on Wednesday 14th January 2026


